Introduction
Hey there, fellow travelers and photography enthusiasts! Today, I want to share a unique experience with you. Imagine being out in a pea patch, surrounded by rows of flourishing peas, ready to be picked and processed. Join me as I walk you through the process of picking, shelling, blanching, and freezing peas efficiently. Let’s dive into the details together!
Picking Peas
To start off, when it comes to picking peas, it’s crucial to know when they are ripe for harvesting. A handy tip is to gently press the pea pod – if it gives a bit, the peas inside are ready to be picked. On the contrary, if the pod feels firm and the peas are not clearly visible, they are still immature and should be left to ripen further.
Shelling Peas
Shelling peas can be a tedious task for some, but fear not! A quick technique to shell peas efficiently is by taking the upper part of the pea pod and gently opening it from the outside. Different pea varieties may require slightly varied methods, but the general idea is to release the peas from the pod with ease.
Utilizing a Pea Sheller
For those who prefer to skip the manual shelling process, investing in a pea sheller can be a time-saving solution. By using a pea sheller device, you can effortlessly shell a large quantity of peas in a fraction of the time it would take to do it by hand. It’s a convenient option for those with a surplus of peas to process.
Blanching and Freezing Peas
After shelling your peas, the next step is blanching them before freezing. Blanching helps preserve the color, texture, and flavor of the peas. By briefly immersing the peas in boiling water and then cooling them down, you prepare them for long-term storage in the freezer. This process ensures that your peas remain fresh and delicious when you decide to use them in your meals.
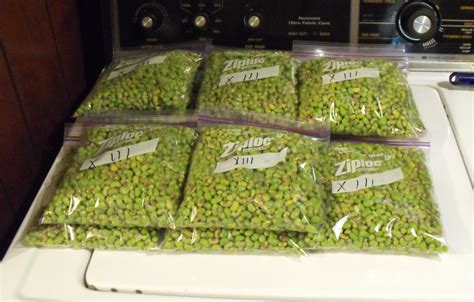
Final Steps for Freezing
Once the peas have been blanched and cooled, it’s time to pack them for freezing. Fill up your containers with the peas, leaving some space for expansion. Cover the peas with the blanching liquid before sealing the containers tightly. This extra step helps protect the peas from freezer burn and ensures they maintain their quality during storage.
Now that you’ve learned the process of picking, shelling, blanching, and freezing peas, you’re ready to enjoy your homegrown peas all year round. Whether you prefer the hands-on approach or opt for time-saving methods like using a pea sheller, the end result is equally rewarding – delicious peas at your convenience.
Related Questions
1. How can you tell if peas are ready to be picked?
– Look for peas that give slightly when pressed in the pod, indicating ripeness for harvesting.
2. What is the purpose of blanching peas before freezing them?
– Blanching helps preserve the color, texture, and flavor of the peas while preparing them for long-term storage in the freezer.
3. How can a pea sheller device aid in the pea processing process?
– A pea sheller can significantly reduce the time and effort required for shelling a large quantity of peas, making the task more efficient.
4. Why is it essential to leave headspace in containers when freezing peas?
– Leaving headspace allows room for the peas to expand during freezing and prevents the containers from bursting.
5. What tips can help maintain the quality of frozen peas for an extended period?
– Pressing out excess air from the containers and ensuring they are tightly sealed can help maintain the quality of frozen peas and prevent freezer burn.